Introduction
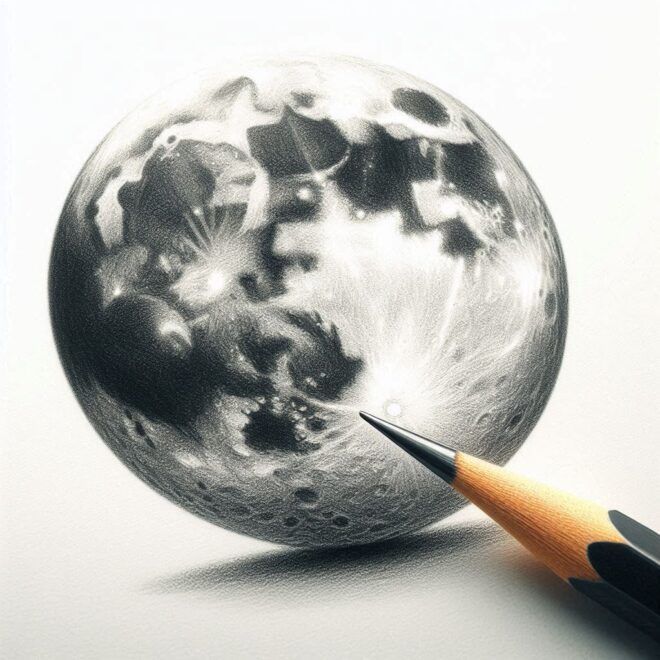
The moon appears in the night sky as a bright, circular object that slowly changes shape during the night and over the course of the month. Many artists have found it to be an inspiring subject, especially when its full face is presented and its light cast upon nearby objects. In order to draw a moon effectively, you should know how it’s made up and what makes it so beautiful.
Follow these step-by-step instructions on how to draw a moon to help you get started on your own project.


Method – 1
Start with the Basic Shape
Start with a circle. It doesn’t have to be perfect; in fact, if you draw freehand rather than measure out circles on paper first, it will look much more natural. Don’t worry if your circle isn’t perfectly round; just draw one that looks good enough and then adjust as necessary later on.
You don’t want to spend too long on any single step, because once you move onto something else, it becomes difficult to go back and fix mistakes
Add details like craters
Make craters. Craters are super easy to do. Just take your darkest shade of gray, dip a brush into it, and tap it over parts of your moon where you think craters might form. Don’t overthink them; just do them wherever feels right!
Create a smooth transition from light to dark
The moon is completely in shadow, so you can use that fact to guide you as you shade your moon. Softly darken one half of your drawing of the moon, and then use a blending tool like smudge or airbrush (or even just your finger) to blend softly from one side of your drawing over to another.
Keep in mind that there are no hard lines between light and dark on your drawing; try using softer shades of gray and blending along curved lines instead. In addition, try not worrying too much about getting every detail right at first; feel free to erase if necessary!


Add shadows behind the moon
Shadows can help ground your drawing, giving it an illusion of depth. One way is to put them behind an object; in our case, we’ll add a shadow behind our moon. To create one, follow these simple steps: draw a wavy line below and behind your moon using a series of curved lines.
Erase or leave out parts of it until you like what you see. It doesn’t have to be perfect—in fact, some imperfections will make it look more realistic!
Use colors creatively
There are many ways you can go about drawing a moon. One way is to use different shades of grey, or even better: try mixing white, black and yellow paint and see what happens. Let your imagination go wild! And remember: there are no wrong answers when it comes to art!
Also Read: Light Bulb Step-By-Step Drawing Guide
Method – 2
Mastering the Moon: A Step-by-Step Guide with Artistic Flair


The moon, a celestial beacon that has captivated humanity for millennia, is an artist’s dream. Its ever-changing phases, the soft luminescence it casts, and the stark beauty of its cratered surface all provide endless inspiration. Whether you’re a seasoned artist or just starting out, capturing the moon on paper can be a rewarding and enriching experience.
This comprehensive guide will take you through the process of drawing the moon, from the basic foundation to adding artistic details that bring it to life.
Capturing the Lunar Essence: Understanding the Moon’s Composition
Before we delve into the artistic aspects, let’s take a moment to understand what the moon is actually made of. Unlike Earth, the moon has no liquid water or atmosphere. Its surface is a rocky landscape covered in craters, formed by impacts from asteroids and comets over billions of years. These craters hold valuable clues about the moon’s history and formation.
The moon’s dusty surface, known as regolith, is rich in various minerals like silicon, oxygen, aluminum, iron, and calcium. Interestingly, recent studies suggest the presence of water ice trapped in permanently shadowed craters near the moon’s poles. This discovery has sparked renewed interest in lunar exploration, with potential implications for future human habitation.
Understanding these scientific details can add depth to your artistic interpretation. By incorporating subtle textures and color variations to represent the moon’s composition, you can create a more realistic and visually compelling artwork.


Laying the Foundation: Sketching the Basic Moon Shape
Now, let’s get our creative juices flowing! The first step is to draw the basic shape of the moon. Here’s where you can embrace the beauty of imperfection. While a perfect circle might seem ideal, a freehand approach will lend a more natural look. Don’t get bogged down in achieving perfect symmetry – the moon’s illumination can cause its apparent shape to vary slightly.
Pro Tip: If you’re struggling with drawing a freehand circle, trace the outline of a round object like a coin or a bottle cap. This can be a helpful starting point, but remember to adjust the circle as needed to achieve the desired moon phase.
Craters: Adding Depth and Texture
The moon’s defining characteristic is undoubtedly its cratered surface. These craters, a testament to the moon’s tumultuous past, add a sense of depth and texture to your drawing. Here’s where you can unleash your creativity.
Instead of meticulously drawing perfect circles for each crater, use a variety of shapes and sizes. Experiment with a light touch to create shallow craters and a heavier hand for deeper ones. Don’t be afraid to overlap craters – the moon’s surface is a complex landscape with a long history of collisions.
Modern Twist: Consider incorporating recent lunar discoveries into your artwork. For example, you could depict a robotic rover exploring a crater or hint at the presence of water ice in permanently shadowed regions.
Shading for a Luminous Effect: Creating the Illusion of Light and Shadow
The moon’s beauty lies in the interplay of light and shadow. Since the moon reflects sunlight, only half of its surface is illuminated at any given time. This creates a gradual transition from light to dark on the moon’s face.
To capture this effect, use a soft pencil or charcoal to gently shade the dark side of your moon. Remember, the transition from light to dark shouldn’t be harsh. Use a blending tool, a cotton swab, or even your finger to create a smooth gradient. Lighter shades of gray can be used along the border between light and dark to create a more natural-looking transition.
Artistic Exploration: Don’t be limited to traditional shading techniques. Experiment with different mediums like charcoal or pastels. You can even try using a textured tool to add a sense of roughness to the moon’s surface.
Beyond the Moon: Adding Context and Depth
While the moon itself is a captivating subject, consider adding elements to your artwork that create a sense of place and depth. A starry night sky with twinkling stars adds context and enhances the celestial theme. If you’re feeling particularly adventurous, you could depict the moon rising or setting over a landscape, casting long shadows and bathing the scene in a soft, ethereal glow.
Modern Inspiration: Look towards current space exploration missions for inspiration. Perhaps you could draw the moon as seen from the window of a lunar lander, or depict a futuristic lunar colony nestled in a crater.
Embrace Color: Experimenting with Artistic Expression
The moon is often depicted in shades of gray, but there’s room for artistic expression when it comes to color. Did you know that during a lunar eclipse, the moon can take on a reddish hue due to the scattering of sunlight through Earth’s atmosphere? You could experiment with subtle variations of
of yellow, orange, and even red to depict a lunar eclipse. For a more abstract approach, consider using a cool blue palette to evoke the feeling of a moonlit night. The possibilities are endless!
Artistic Inspiration: Take inspiration from astronomical photography. Modern telescopes and cameras can capture stunning details of the moon’s surface, revealing subtle color variations. These images can serve as a valuable reference point for adding a touch of realism or a burst of artistic flair to your artwork.
Adding Details: Enhancing the Narrative
Once you’re happy with the basic structure and shading of your moon, consider adding details that enhance the narrative. For a touch of realism, you could depict mountains along the terminator (the line between light and dark) or cast faint shadows from prominent craters.
Storytelling through Art: If you’re feeling particularly creative, consider using the moon as a focal point in a larger composition. Draw a lone astronaut gazing up at the moon, a silhouette of a howling wolf bathed in moonlight, or a majestic spacecraft soaring towards the lunar surface.
Practice Makes Perfect: Experimentation and Refinement
Remember, mastering the art of drawing the moon takes practice and experimentation. Don’t be afraid to make mistakes – they can often lead to happy accidents and unexpected artistic discoveries.
Embrace the Journey: The most important aspect of artistic creation is the enjoyment of the process. Let your imagination run wild, explore different techniques, and most importantly, have fun!
The moon, with its ever-changing phases and timeless beauty, is a constant source of inspiration for artists. By following these steps and incorporating your own artistic voice, you can create a captivating and unique portrayal of this celestial wonder.
Also Read: Coffee Cup: How to Draw a Coffee Cup Step by Step


