


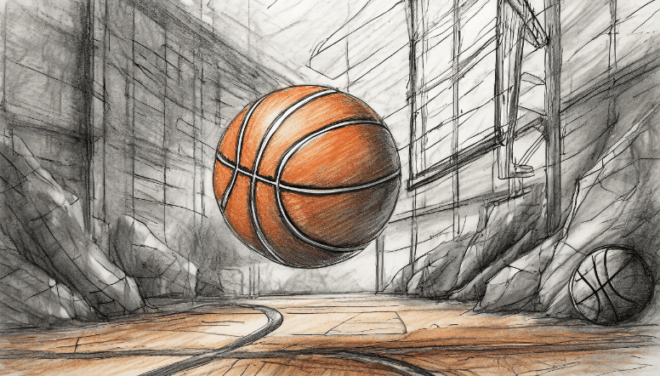
Basketball is one of the most popular sports in America and the world. It’s simple to pick up, but hard to master. if you’re looking for ways to teach your kids about basketball, take some cues from this step-by-step guide on how to draw a basketball.
Sketches
Sketches aren’t necessary for most drawings. In fact, detailed sketches can be detrimental if you already have a very good idea of what you want your final product to look like. If you don’t have much experience drawing, spend some time experimenting with different ideas before diving in and creating something permanent on paper.
Start your basketball drawing in pencil on standard paper with an HB pencil. Use light, smooth strokes for sketching. This is just an outline and doesn’t have to be perfect—in fact, it shouldn’t look perfect or realistic. The object of creating a sketch is to capture key proportions and shapes.
Step-by-Step Instructions
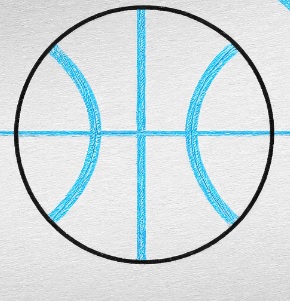
Draw a basketball circle using a simple curved line.
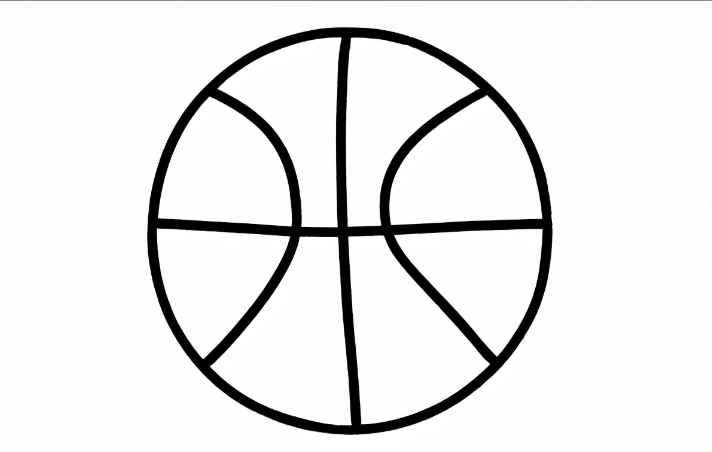
Draw dotted straight line from top to bottom of basketball circle and make another straight line at an angle below it.
- Using three curved lines, draw out backboard.
- Using single curved lines draw goal post on right side and scoreboard with clock on left side of basketball court.
- Use smaller curly curved lines on either side of backboard to create padding around border of drawing.
- Draw net at bottom of backboard with two small circles.
- Finally add shading or color your basketball court drawing.
- You can also use different colors to represent different teams if you like and then add details such as players and coaches on both sides if you want!
- Have fun creating your own unique basketball drawings!
Finishing Touches
If you want your drawing to look truly professional, make sure to put on your finishing touches. For example, if you’re creating a basketball, spend time coloring and detailing each part of your ball so that it matches what you envisioned in your head. Remember, there’s nothing worse than an unfinished work!
Mastering the Art of Drawing a Basketball Court [Method 2]
Basketball, a graceful dance of orange spheres and human agility, holds a special place in the hearts of millions worldwide. For kids, it’s more than just a sport; it’s a gateway to imagination, teamwork, and endless hours of dribbling fun. And what better way to ignite that passion than by letting them recreate the magic on paper? This guide will take you through the exciting journey of drawing a basketball court, step-by-step, no artistic experience required!
Warm-Up: Skip the Sketch, Embrace the Flow
Unlike other art forms, basketball drawings often thrive on spontaneity. Detailed sketches can sometimes stifle the creative flow, especially for budding artists. So, unless you have a meticulously crafted vision in mind, ditch the sketchpad and embrace the freedom of starting directly on your drawing paper. Remember, perfection is overrated – the key is to capture the essence of the court with basic shapes and proportions.
Step 1: Laying the Foundation – The Humble Basketball
Grab your trusty HB pencil and let’s begin! Start by drawing a simple circle for the basketball. No need for rulers or compasses here – use smooth, light strokes to create a relaxed, organic curve. Think of it as capturing the ball’s dynamic energy, not a perfect geometrical form.
Step 2: Lines & Angles – Defining the Court
Now, imagine the ball placed in the center of a rectangle. Draw a light dotted line vertically through the ball, extending it upwards to represent the backboard’s edge. Add another diagonal line below the ball, marking the free-throw line. Remember, these lines are guides, not set-in-stone borders.
Step 3: Backboard Bonanza – Building the Canvas of Dreams
Time to bring the iconic backboard to life! Use three curved lines, starting from the top of the vertical line and gently arching downwards, creating the familiar rectangular shape. Don’t worry about precise measurements; let the lines flow naturally.
Step 4: Courtside Companions – Goal Post & Scoreboard
No basketball court is complete without its trusty companions: the goal post and scoreboard. On the right side of the backboard, draw a single curved line extending upwards, representing the sturdy goal post. On the left, create a rectangular shape with curved edges for the scoreboard. Don’t forget to add a small circle within it for the clock, keeping track of those crucial buzzer-beaters!
Step 5: Padding Up – Adding Depth & Flair
Our court is starting to look like a real contender! Now, let’s add some depth and style. On either side of the backboard, use small, curly lines to create the padding that protects players from those intense rebounds. Remember, these lines don’t have to be uniform; embrace the playful spirit of the game!
Step 6: Swish Time! – Netting the Perfect Shot
What’s a basketball court without the iconic net? Draw two small circles at the bottom of the backboard, one slightly above the other. Then, using several curved lines connecting these circles, create the delicate net, ready to swish those winning shots.
Step 7: Lights, Camera, Action! – Adding Color & Finishing Touches
Now comes the fun part – unleashing your artistic spirit! Grab your colored pencils, crayons, or paints and bring your court to life. Use realistic tones for a classic look, or go wild with vibrant colors, representing your favorite team or creating a fantastical dream court. Remember, there are no rules here – let your imagination soar!
Bonus Round: Taking it Up a Notch
For the truly adventurous artists, there’s no limit to the possibilities. Add players in action, coaches barking instructions, or even cheering fans in the stands. You can even incorporate current events, like showcasing a famous player or commemorating a legendary championship win. Let your creativity be your guide!
Also Read: Easy, Cute, Love Human Heart Drawing